|
|
|
|
News The Project Technology RoboSpatium Contribute Subject index Download Responses Games Gadgets Contact <<< Print head HP6602 Winding machine >>> World Printer - an art installation for Theo DeutingerThe video about the WorldPrinterMecanics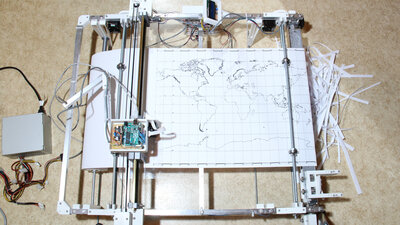
Anyone who would like to see the world printer live in the final stage has the opportunity to do so from March 13th to April 10th, in 2021 in the Forum Stadtpark in Graz, Austria. In this chapter I show you the "world printer" that I created for an art project of Theo Deutinger. About a year ago, I was asked if I could build a printer that could print a world map exactly once within 24 hours as part of a planned art installation. After these 24 hours, the next map should be added seamlessly, so that the earth's surface is slowly but steadily printed on endless paper. At the other end, the printout should be destroyed, which I achieved with a razor blade that cuts the paper into strips. If you now say that this is a pure waste of resources, you have already understood a basic idea of this installation, because art is meant to astonish your brain and so trigger discussion. Here, the printer is still not in its final stage of construction. If you want to get to know the sponsor behind this project better, the internet address of his architectural office is www.td-architects.eu. 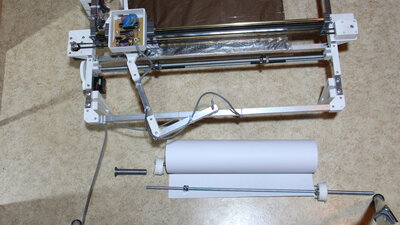
The paper is fed through paper rolls having a width of 43cm. A 10mm threaded rod with two ball bearings at the ends leads through the paper roll, one end of which is firmly screwed to the threaded bar and the second ball bearing is held in position by a 3D printed spacer. The threaded rod is hooked into the grooves on the two rear feet, with the spacer pointing to the side with the electronics. 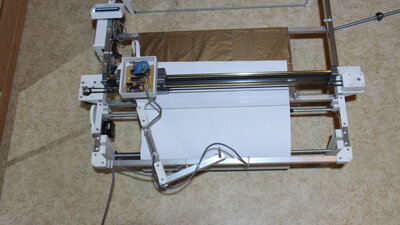
The paper now has to be inserted, which is a fiddly process - prototypes rarely offer the full comfort of a series machine. The paper must first be threaded between the lower plate, covered with aluminum foil and an upper Plexiglas plate. The aluminum coating on the lower plate was necessary, because otherwise the paper got electrostatically charged, sticking to the lower plate and so stopping the paper feed. This effect firstly occurred in the last test phase - apparently because the ambient air was drier than all days before. 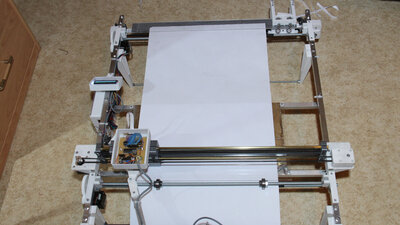
From the rear pair of rollers, the paper runs forward to the cutting mechanism: Here, the paper must also be threaded under the strip of plexiglass - as soon as this is done, the front bar with the ball bearings can also be placed on top. 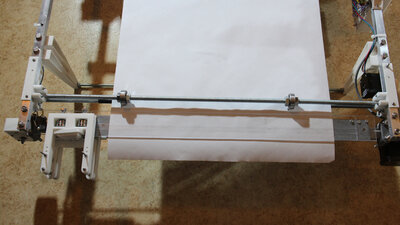
When the paper is inserted, make sure that the edge of the paper sticks out about half a centimeter at the front end - this can be adjusted by manually turning the paper roll. This is needed to make sure that the cutting mechanism can perform the first cut correctly. 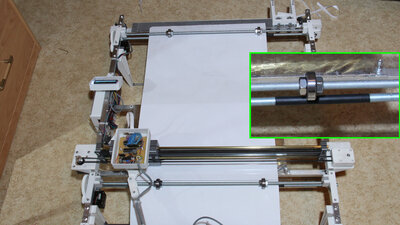
The paper is forwarded by two pairs of rollers, one at the rear end directly above the paper roll and a second stepper motor is located at the front of the machine just before the cutting mechanism - the threaded rod is screwed to the larger gear, the smaller gear is attached to the shaft of the stepper motor. The lower rollers are composed of a 10mm threaded rod with pieces of shrink tubing. A second threaded rod, to which two ball bearings are attached, is placed on top of each of these rollers, so that the ball bearings press on the shrink tubing. While inserting, make sure that both ball bearings touch the surface of the paper. 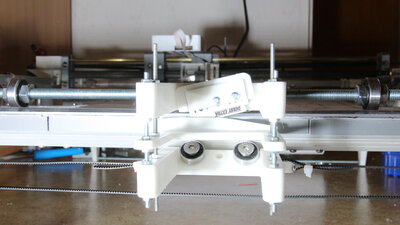
The paper is cut with the help of a razor blade: This must be fixed in such a way that the blade is behind the front guide! If the razor blade is screwed on, the cutting mechanism is ready for use. Driven by a stepper motor via a timing belt, the blade cuts an approximately 1cm wide strip from the world map from left to right every half hour. The fact that not every cut strip of paper falls down immediately did not prove to be a problem in course of the test phase - sooner or later all continents fell over the end of the world. 
The cartridge can be changed if necessary, as with standard printers, by removing it from the holder and inserting the new cartridge afterwards. 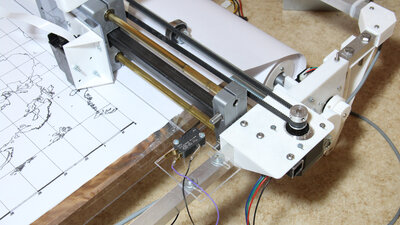
The print head is driven by the fourth stepper motor, also via a timing belt. The print head is guided by 8mm brass tubes and linear ball bearings, simply because I had these materials lying around in the basement. The cartridge is arranged in such a way that the line of the nozzles points into the direction of printing - that process is meant to happen slowy, degree by degree. In theory, a single nozzle would be enough to do the job, but for reliability reasons I use all 12 nozzles equally. The software randomly selects which nozzle sets which dot of the print. Furthermore, each dot of the world map is covered with ink three times. Even if several nozzles fail after a couple of worlds was printed, no gaps will appear. Electronics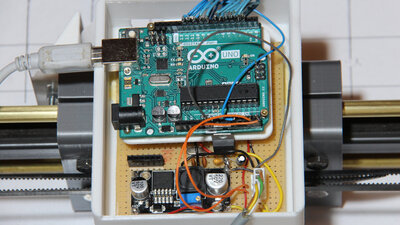
How to control the HP6602 printhead is written in the previous chapter. Same as with the prototype I was using the Arduino UNO board to control the nozzles during the test runs. 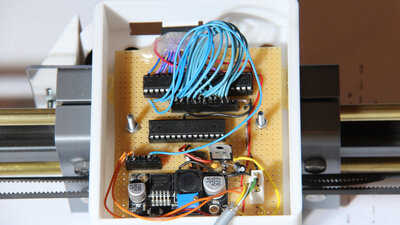
The advantage of this developer board is that the ATmega328 microcontroller can also be operated without the UNO board after the software development has been completed. So this part of the electronics becomes more compact - one of the many reasons why I like the Arduino Uno. 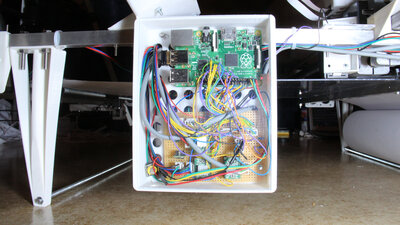
The Raspberry Pi is the central brain of the World Printer, used to read the bitmap file of the world map and to control the stepper motors as well as the LCD display. The print data is transmitted to the ATmega329P microcontroller through two GPIOs. I have attached a DS3231 module so that time is kept even when the Raspberry Pi isn't powered. 
The printer can be controlled by three push buttons. After truning the printer on, the current time is displayed and can be adjusted with the buttons. During operation, the display shows the world time and the meridian currently being printed. The software running on the Raspberry Pi ensures that the print is synchronized with the rotation of planet earth. Anyone who is on site at high noon can watch the jump across the prime meridian from east to west. The jump across the date line from west to east takes place at midnight, in the absence of visitors. 
Circuit layout Software/DownloadThe software is part of the download package (36MB). This can process bitmap files with a color depth of 24 bits. No gray scale pictures are printed. All points below a given threshold are interpreted as black dots, above as white.The 3D files of the printed parts are also included. It is just a rough build instruction written for tinkerers that know how to handle a Raspberry Pi and an Arduino UNO. Sourcing partsWhen buying components via the affiliate partner links I have listed in the table (or through the banners on my pages) you help to keep my my projects going - many thanks!Clicking on the links does not mean you have to buy - you can simply browse through the pages ;-) Of course, supporting my freely accessible educational platform without shopping but by making a donation or becoming a Patreon also works. Many thanks to everyone who already sent me an obol! If you know more parts that are good for building circuits shown on this page, please leave a comment.
<<< Print head HP6602 Winding machine >>> News The Project Technology RoboSpatium Contribute Subject index Archives Download Responses Games Links Gadgets Contact Imprint |
|
|