|
|
|
|
News The Project Technology RoboSpatium Contribute Subject index Download Responses Games Gadgets Contact <<< Imprint ...to be continued. >>> 3D printer Zonestar QR2The video about the Zonestar QR2 3D printerGet the printer at Gearbest.com Special offer with Coupon Code: 0109P802QR2 Have a look at the column Shopping Tips to get more special offers. The printer ships with no filament spool, thus don't forget to order filament. About the device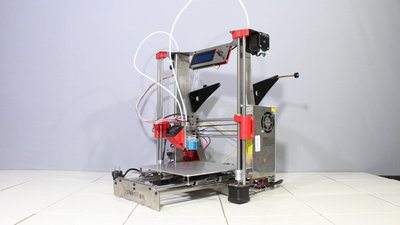
The Zonestar P802QR2 is almost identical to the M8R2 from the same company that I have reviewed before. While the later model has a 2-in-1 hotend, the QR2 has two separate extruders. With that you can process different plastics in one run. Furthermore this printer has a distance sensor, which improves the bed levelling process. Same as the previous printer, the frame is made of 2mm steel (or is it thicker?), a couple of construction elements are 3D printed. With the Zonestar you get a dual extruder 3D printer for a really low price that works - in principle. The print results in single extruder mode are definitely good, the dual extruder operation has it's downsides. I am a big fan of the Prusa i3 clones, since those machines are great to dive into theory and practice of 3D printing - the P802QR2 adds dual extruder functionality to the game. The simple LCD display with the rotary switch makes the hardware compatible to common printer Firmwares - the Zonestar comes with a customized version of Marlin. AssemblyYou can download the tool I used to align the X axis.You can get the pictures I took during the assembly of my printer as Download package (36.4MB). Here I'd like to mention a couple of steps that were not so straight forward: 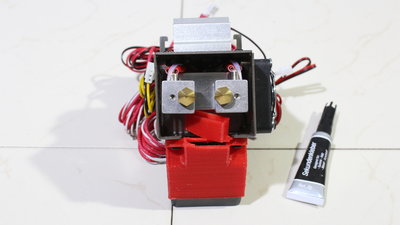
The duct of the coolant fan was broken on my device out of the box which was fixed quickly with a drop of superglue. 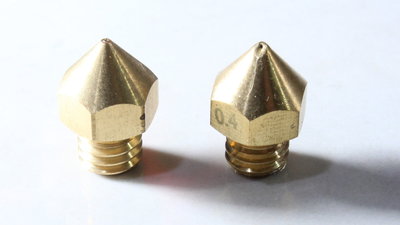
One of the nozzles was also damaged and I had to replace it with a spare part I had in stock - obviously the print head made a hard contact with a non soft surface before it entered the packing. 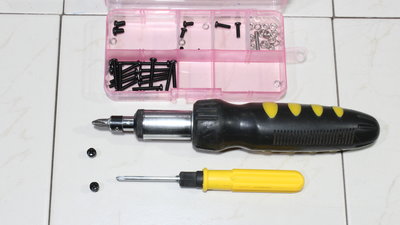
The tools needed for the assembly are part of the kit, however the screw driver doesn't fit perfectly to the cross-head screws. It's hardly recommended to use a better screwdriver, since some of the screws are hard to tighten. 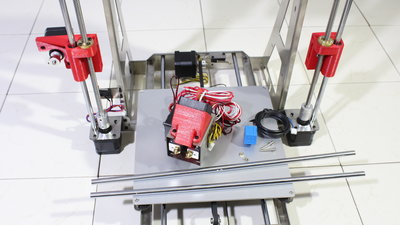
The screws needed to mount the distance sensor are a bit too long, which is why I used an additional nut besides the recommended washers as spacer. 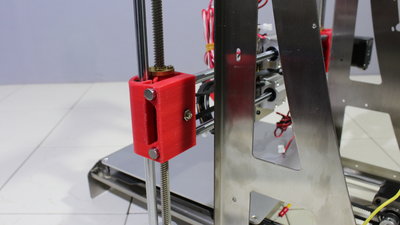
To get the right tension on the belt of the Y axis I have tightened the screws on the deflection pulley after mounting the belt. The guiding rods of the X axis are kept in place only by friction so that the mount might move during operation - a locking screw is missing in the design. I used this fact to get best belt tension of the X axis by moving the mount in place after assembling the belt. 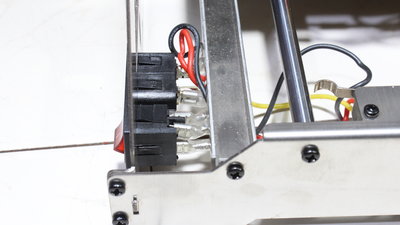
The power supply delivers up to 20A at 12V and as with most of the cheap 3D printers it's one of the badly insulated types - this printer is not for the kids! Additionally at this printer, the terminals of the mains voltage are touching the metal frame - I don't trust in the thin insulation between high voltage and the metal touched by your fingers during operation. Because of the fact that the power supply is insulated from the metal frame by plastics spacers, the protective earth is nearly without any effect! 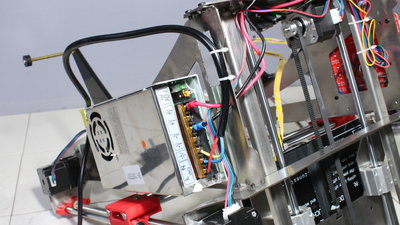
Since the power switch is hard to reach I have connected the mains cable directly to the power supply. Don't forget to tighten the mains cable on the frame as well to have some sort of strain relief. I am using a switchable socket outlet so that I can turn off the printer quickly in case something goes wrong. Electronics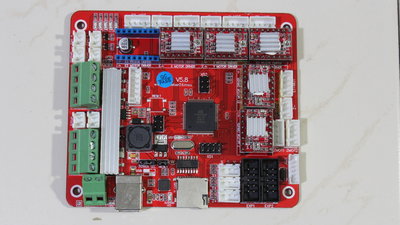
The mainboard has a couple of unused plugs left, so there is space for experimentation: Besides changing the firmware, you can connect a third extruder. Sample prints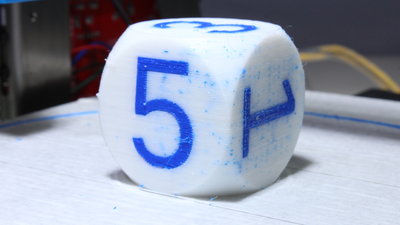
Material: PLA Layer height: 0.3mm Dimensions: 40x40x40mm Print time: 6 Stunden I have designed a two tone dice in OpenSCAD as a first test run. Two spools of PLA are needed to print the dice, a blue and a white one. Even with perfect filament parameters, there is always some plastics dripping out of the inactive nozzle over time. Expensive printers with multiple extruders usually lift the inactive print heads or drive them to a parking position to prevent the plastics from getting mixed in a layer. That's not true for the Zonestar and as you can see that even the inactive nozzle deposits plastics on the layers. The dark blue filament is clearly visible on the white background. 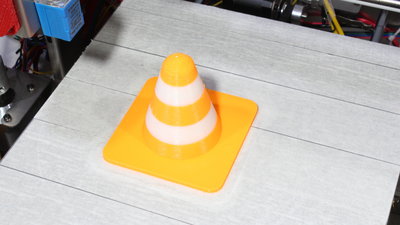
Material: PLA Layer height: 0.3mm Dimensions: 75x75x60mm Print time: 5 Stunden In two color mode I could not get really good results with a layer height of less than 0.3mm. 3D printing is never click and forget - using two extruders means considering even more parameters. If you don't fear those efforts, you can indeed get practical results with the Zonestar. The results are really good if your design has no color changes only between layers, not inside of them. 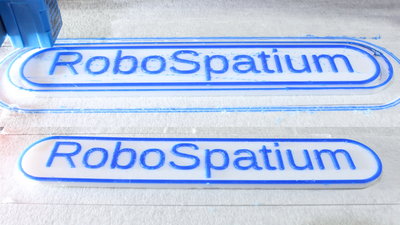
Material: PLA Layer height: 0.3mm Dimensions: 155x30x4mm Print time: 2 Stunden To get a good result, I have lowered the print speed of the outer perimeters to no more than just 15mm per second. As seen at the dice, there are blue artefacts on the surface of the white base plate, however those strings can be removed with ease so that the result looks good. 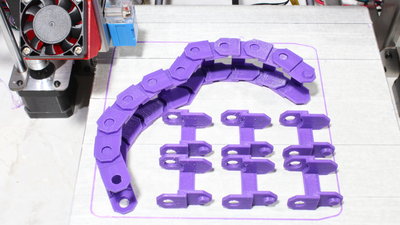
Material: PLA Layer height: 0.2mm Dimensions: 34x30x16mm Print time: 10 Stunden If you intend to run a job using only one extruder, it is recommended to adjust the tip of this hotend clearly lower than that of the inactive nozzle. With that configuration I am printing chain links for a tracked robot, here. The layer height is set to 0.2mm - my personal standard value and a good compromise between detailed results and print time. There is no stringing in the round openings of the vertical surface - the print head is definitely not bad. In total I have printed 16 chain links in one run, which took about 10 hours of print time. The links fit out of the printer and that what counts in rapid prototyping. 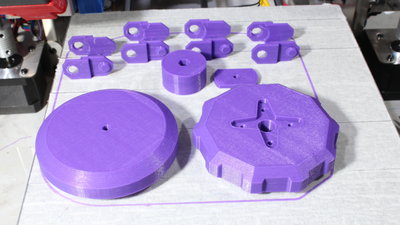
Material: PLA Layer height: 0.2mm Dimensions: 85x85x19mm (pro Rad) Print time: 7 Stunden Wheels and more chain links of the robotic vehicle. 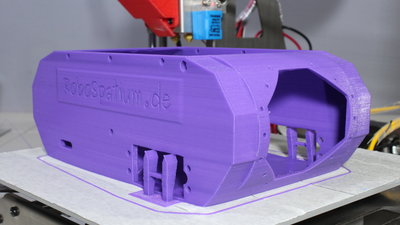
Material: PLA Layer height: 0.2mm Dimensions: 190x130x70mm Print time: 17 Stunden Chassis of the robot. <<< Imprint ...to be continued. >>> News The Project Technology RoboSpatium Contribute Subject index Archives Download Responses Games Links Gadgets Contact Imprint |
|
|