|
|
|
|
News The Project Technology RoboSpatium Contribute Subject index Download Responses Games Gadgets Contact <<< Imprint ...to be continued. >>> JG Aurora A3S 3D printerThe Video about the JG Aurora A3S 3D printerGet the printer at Gearbest. Limited offer with Coupon Code: A3SCZ The printer ships with only 500g of white PLA, you can get additional filament at Gearbest. About the A3S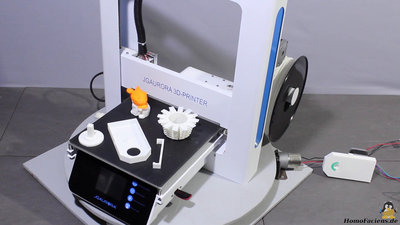
The print volume is 205x205x205mm which is sufficient for most projects. The maximum temperature that is limited by software is 90°C - with a lack of insulation on the bottom side of the print bed, you won't get higher even without limitation by software. The maximum temperature of the extruder is 250°C so that all common materials can be processed with the A3S. The coated glass on the print bed keeps objects sticking on the surface while printing and makes removing the prints an easy thing, because the glass plate contracts while cooling down, which loosenes the plastics. If parts are sticking too good after cooling down, I am heating the print bed to 80°C and let it all cool down as soon as the target temperature is reached. After that you can remove the prints with ease. Before a print I am cleaning the surface with ethanol. 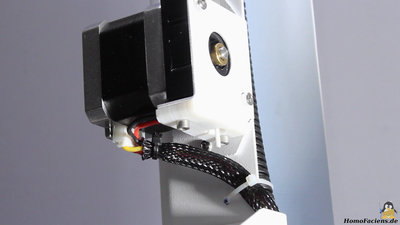
The A3S has a build in sensor that pauses a print whenever it runs out of filament. You can resume the print after reinserting filament. That will make your day every now and then. You can also resume a print job after a power outage. Assembly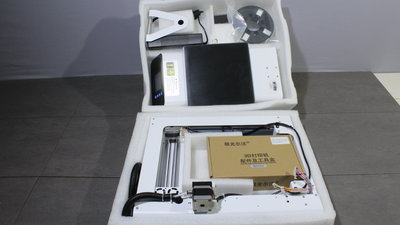
The JG Aruora shpis preassembled. The surface is painted in white and looks good - only minor scratches are visible when having a very close look. 
The sturdy frame as well as the box containing the electronics is made of steel planels.. After unpacking, you only have to assemble the electronic box on the frame, however those parts don't fit perfectly. Caused by the thick paint, the frame doesn't flush easily into the slits of the box. Four screws are used to connect both parts. The wiring is done by simply inserting three plugs - there is nothing you can do wrong. 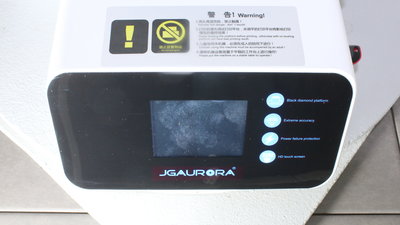
You can see fingerprints behind the glass of the touchscreen - these are definitely not mine! 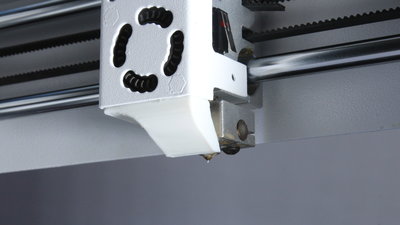
Out of the box the air isn't directed to the tip of the nozzle. To control the coolant flow, you must print a stl file that comes with the USB stick of the printer. The shape of the part is suboptimal, however it's better than nothing. Belt tension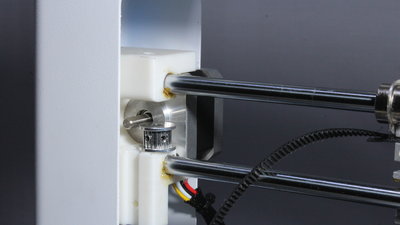
One reason for the backlash in X/Y direction I noticed during first test prints is the loosen belt of the X axis. Unfortunately there is no tensioner on that axis and the belt is mounted on the print head throgh loops, which is very fiddly so that I decided to remove the pulley on the X motor, mounted the belt on the print head and remounted the pulley on the X motor afterwards. After a couple of tries I got the belt mounted tightly on that axis. 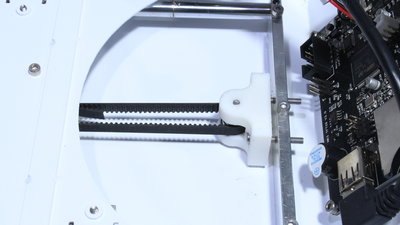
I opened the box with the electronics to hace a look at the belt of the Y axis as well. There is a belt tensioner on that axis that was adjusted perfectly out of the box. Problems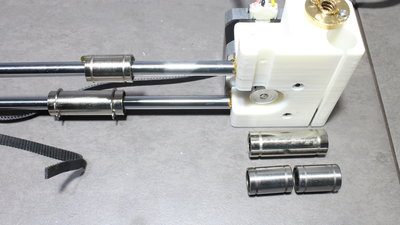
I found a bad linear bearing when having a close look at the mechanics of the Z axis. After disassembling the frame I nitoced that there is a clear difference between the left and right bearing that is definitely useless. 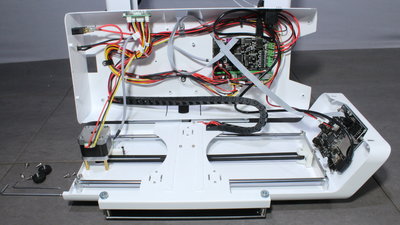
There was also an issue with one of the three bearings on the Y axis. Because returning a device you bought for very cheap in a far, far away country is anything but recommendable, all you can do is fixing that issue by yourself. After reporting the problem, the manufacturer brought a spare part on it's way to Germany, however to speed up the process I am using linear bearings of another printer I had in my worksohp to repair the A3S. I used these linear bearings as a replacement. Two of those short bearings replace one of the long bearings of the A3S, so that you need 10 bearings in total. 
There was no lubricant on the spindles of the Z axis, making the printer loud and causing unwanted vibrations. A bit of grease eliminates the noise and with that, the Z axis moves smoothly. Sample prints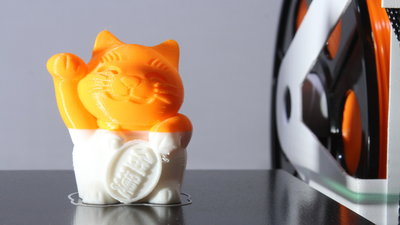
Money cat Layer height: 0.2mm Print time: 2.5 hours Material: PLA With this priont I demonstrated how to resume a print after power outage and after running out of filament. I used orange PLA as replacement for the white filament at the bottom. 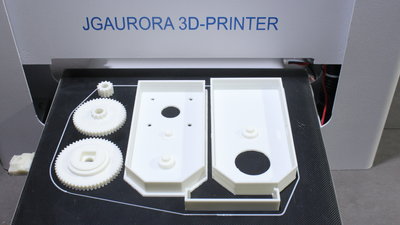
Gearbox Layer height: 0.1mm Print time: 8 Stunden Material: PLA The gearbox works as it comes out of the printer. With the 2.5mm teeth on the gear, the print head must change direction rapidly. The round cylinder on top of the large gear operates as one part of the bearing. Pins and round cuts on the box halves are counterparts of the bearings. 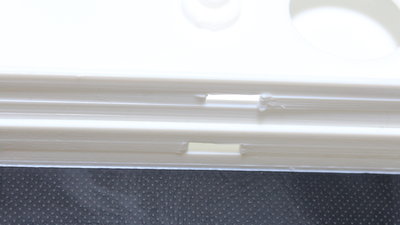
Close look at a half of the gearbox housing: The top part was printed with the loosen X belt and the bad bearings, the bottom part was printed after the repairings. 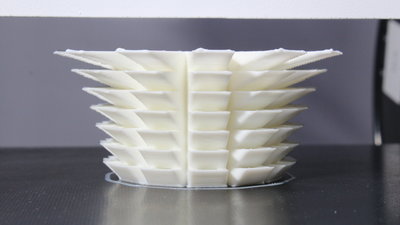
Test print "Overhang" Layer height: 0.2mm Print time: 2 hours Material: PLA The angle is increasing in 5 degree steps with 75 degrees on top of the object. The print was made without the nozzle for coolant flow. 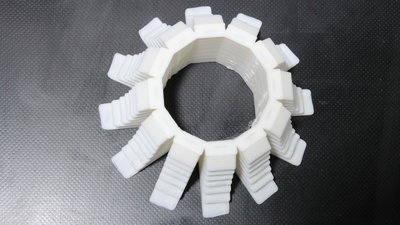
Test print "Overhang" 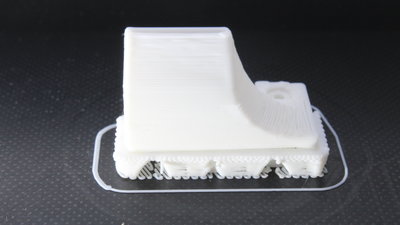
Air deflector Layer height: 0.2mm Print time: 1 hour Material: PLA To control the coolant flow, you must print a STL file that comes with the USB stick of the printer. No perfect design, but better than no deflector. <<< Imprint ...to be continued. >>> News The Project Technology RoboSpatium Contribute Subject index Archives Download Responses Games Links Gadgets Contact Imprint |
|
|