|
|




|
|
News The Project Technology RoboSpatium Contribute Subject index Download Responses Games Gadgets Contact <<< Extruder V7.2 Syringe extruder >>> Printing PLA, PET-G, ABS and Nylon with Direct granules extruder V7.2The video about printing PLA, PET-G, ABS and Nylon with Extruder V7.2.Preparing PLA powder
PLA was - and still is - the standard material used in the development of my extruder. It is inexpensive and trouble-free to print. Producing powder with a suitable particle size has become routine for me. I described in detail how to modify a grain mill in a previous chapter. 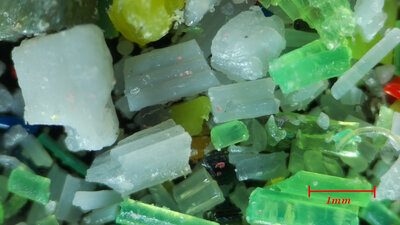
Irregularly shaped fragments of varying sizes are visible under the microscope. The maximum size is limited to 1.6 mm by the sieve, with many significantly smaller particles present. Many are elongated in shape, as the shredded 3D prints were made from fused strands and tend to break more easily along the length of these strands. I presented the mechanical properties of the PLA powder in the previous chapter. Print test pinion from PLA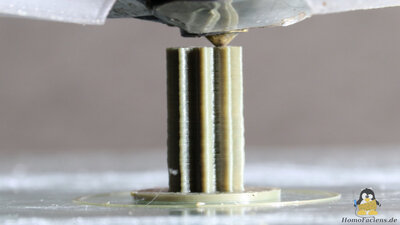
Test print pinion Material: PLA Dimensions: 20x20x20mm Layer height: 0.2mm Extrusion width: 0.5mm Print speed: 20mm/s I have demonstrated PLA prints in the preceding chapters, and the process has become routine for me: load the powder, start the print job, and return when it is finished. If the print quality is insufficient, one simply uses more finely ground powder, as I demonstrated in the previous chapter. Preparing PET-G powder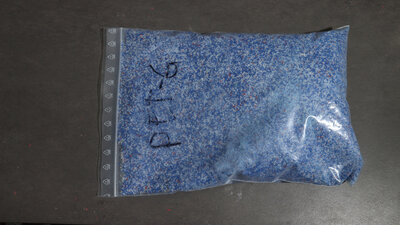
Another material that has accumulated in my basement in quantities almost equal to PLA is PET-G. Processing it is just as straightforward as with PLA - this waste plastic, too, is effortlessly shattered by the mill's blades. 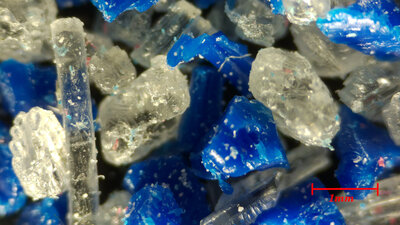
Needle-shaped particles are also visible under the microscope, though they are in the minority. Furthermore, few very small fragments can be detected. Both observations indicate that the adhesion between the plastic strands was significantly stronger than in the PLA prints. Test prints PET-G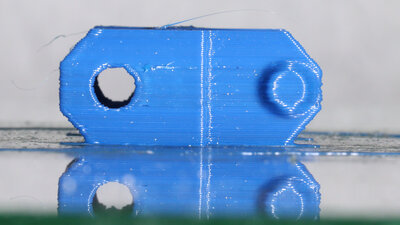
Test print track link Material: PET-G Dimensions: 27x25x12mm Layer height: 0.2mm Extrusion width: 0.5mm Print speed: 30mm/s In terms of printability, PET-G is just as trouble-free as PLA when using version 7.2 of my extruder. The filament factor is only slightly higher - at 115% - compared to that of PLA. A key challenge with this material is its distinct flow behavior within the printing temperature range, which makes PET-G prone to stringing. Additionally, molten plastic can accumulate at the nozzle tip; when this buildup is wiped off, it can occasionally result in blobs and strands appearing on the print. A blob of this kind can be seen here on the outer wall. Overall, however, the print settings are effective enough to prevent further stringing - neither at the circular opening nor between the two walls of the chain link. 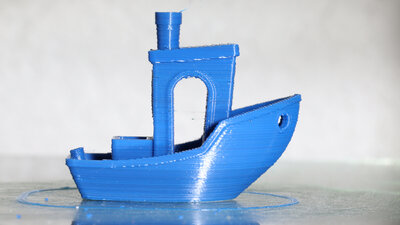
Test print Benchy Material: PET-G Dimensions: 60x31x48mm Layer height: 0.2mm Extrusion width: 0.5mm Print speed: 30mm/s Producing ABS powder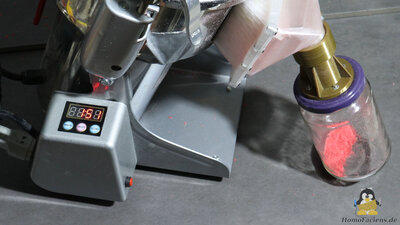
Since I had printed very little with ABS filament up to that point, my scrap bin contained only red and gray parts, making it easy to sort them by color. The prints are easy to shred in the grinder, and the material throughput is only slightly lower than that of PLA and PET-G. 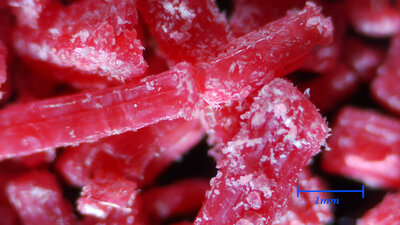
Under the microscope, many rather long, needle-like fragments are visible - a clear indication that the adhesion between the strands was poorer than with PLA and, above all, PET-G. I had produced the shredded prints without a heated build chamber. Many of the fragments are longer than 1.6 mm, and numerous very small granules adhere to the surfaces. Test prints ABS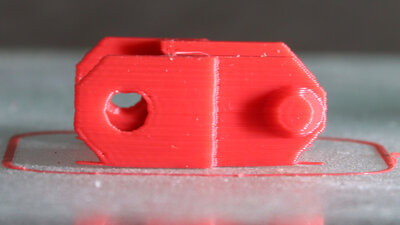
Test print track link Material: ABS Dimensions: 27x25x12mm Layer height: 0.2mm Extrusion width: 0.5mm Print speed: 30mm/s Since the Prusa MK4 lacks a heated build chamber, only small prints are feasible; even with the chain link, I had to experiment a bit to achieve a print free of inter-layer separation. Layer height and extrusion width remain the same as in previous tests. However, I reduced the print speed to 20 mm/s. The print bed temperature is set to 100°C. The filament factor is 167% - noticeably higher than that of the PLA powder. At 270°C, the printing temperature is at the upper limit for ABS; at lower temperatures, the layers failed to bond adequately. Due to the hot summer days, the ambient temperature in my basement was unusually high at 25°C. With these settings, the resulting chain link is free of wall cracks and shows only slightly uneven extrusion. 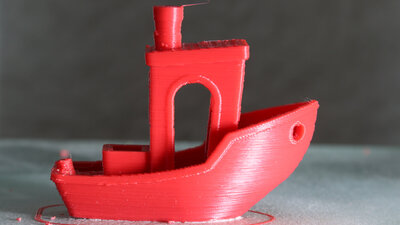
Test print Benchy Material: ABS Dimensions: 60x31x48mm Layer height: 0.2mm Extrusion width: 0.5mm Print speed: 30mm/s Sourcing Polyamide (Nylon) powder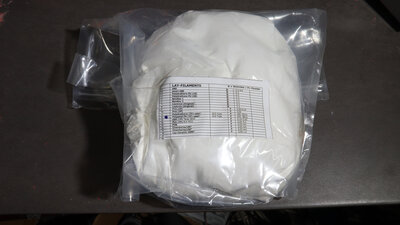
I have never worked with polyamide before, so I didn't have any scrap material of this type in my stock. The material I ordered isn't brand new; it was sold as "used" because it consists of leftovers from the build chamber of an SLS printer. The particle size is specified as 58 µm, but the seller provided no further details about the material. The powder is so fine that, when shaken, it moves almost like a liquid. 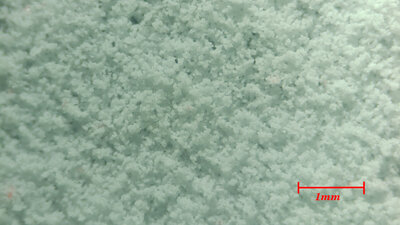
Under the microscope, it becomes apparent just how much smaller the grains are compared to the materials printed previously. 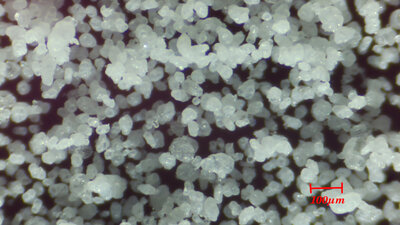
They are visible only at higher magnification and exhibit a narrow size distribution, ranging from approximately 60 to 20 µm. The particles are rounded rather than sharp-edged, suggesting that the material was not produced via milling processes. Common manufacturing methods include precipitation from solvents or direct formation during the polymerization process. Due to its very fine grain size, the powder creates a huge mess immediately upon opening the bag; wearing a suitable dust mask is mandatory. I had to seal the reservoir at the print head with modeling clay to prevent the material from leaking out. Test prints with Polyamide (Nylon)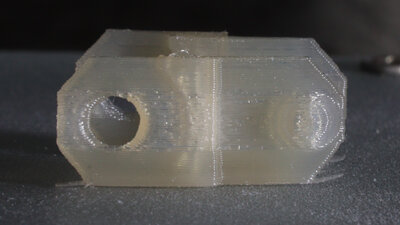
Test print track link Material: Polyamid Dimensions: 27x25x12mm Layer height: 0.2mm Extrusion width: 0.5mm Print speed: 40mm/s Problems arose during printing at 40 mm/s: Air bubbles are visible in the wall, particularly in the area around the opening. These were not caused by moisture in the powder - although polyamide is hygroscopic and should ideally be dried before printing (a step I skipped). The issue turned out to be the retraction settings; the very fine powder requires settings that were not immediately obvious to me. Retraction needs to be performed as quickly as possible - partly to avoid unnecessarily slowing down the printing process, and partly to relieve excess pressure at the nozzle (and even create slight negative pressure) to prevent the molten plastic from dripping out. For the powders printed so far, the maximum speed achievable without the extruder motor skipping steps was 100 mm/s. During deretraction, the extruder must rebuild pressure and exert greater force against the movement of the screw; consequently, the maximum speed here is 90 mm/s - at least for the powders used to date. In this regard, too, the very fine polyamide powder behaves more like a liquid: To rebuild pressure during deretraction, I had to increase the speed for this step to 120 mm/s - which was feasible because the overall friction within the extruder is lower with this powder. A slow deretraction speed does not work at all with the fine powder; much like with a liquid, pressure fails to build up in the nozzle. 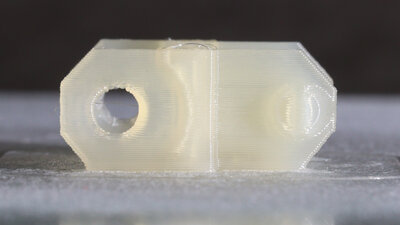
Test print track link Material: Plyamid Dimensions: 27x25x12mm Layer height: 0.2mm Extrusion width: 0.5mm Print speed: 30mm/s It took me some time to figure out this effect, but afterwards, I was able to achieve very clean prints at the higher speed. There are no visible bubbles - neither on the outer wall nor in the internal structure. The extrusion is extremely consistent; I explained in detail in the previous video why this is possible with finer powder. Water vapor - due to the hygroscopic nature of the polyamide - is not an issue with my extruder: The powder is dried inside the extruder as it moves toward the nozzle, and the vapor escapes upwards along the same path as the air trapped in the powder - that is, through the gap between the screw and the extruder wall. The prints turned out perfectly even when the powder had been left exposed in the extruder's hopper overnight - simply switch on the printer and resume work. Compared to PLA powder, the filament factor had to be set to 400%. 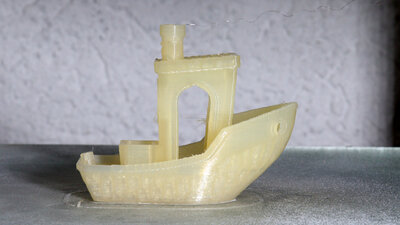
Test print Benchy Material: Polyamid Dimensions: 60x31x48mm Layer height: 0.2mm Extrusion width: 0.5mm Print speed: 30mm/s 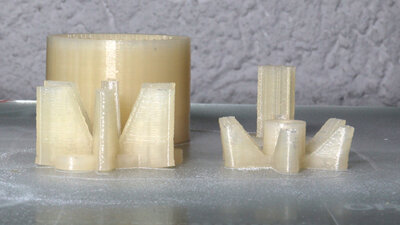
Test print spare parts extruder Material: Polyamid Dimensions: 60x31x48mm Layer height: 0.2mm Extrusion width: 0.5mm Print speed: 30mm/s DownloadThe 3D files and the extruder sketch are available as a download package.<<< Extruder V7.2 Syringe extruder >>> News The Project Technology RoboSpatium Contribute Subject index Archives Download Responses Games Links Gadgets Contact Imprint |

|